P.O. Box 1000
San Jose, CA 95108
Phone: 408-390-4366
SUPPORT CENTER
Control Panel Plesk Features
Parallels Plesk Panel end-user series
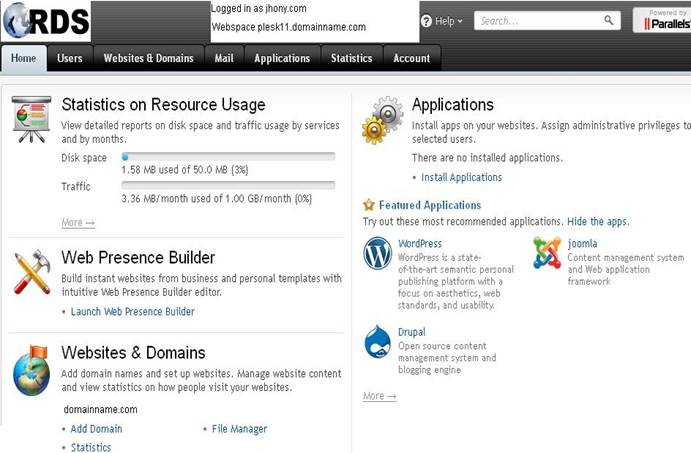
1. Basic of Plesk Interface
2. Mail Creations
3. Create Mail Aliases
4. Setup Email forwarding
5. E-Mail Account in Plesk
6. Access Web Mail in Plesk
7. Create Mailing list in Plesk
Parallels Plesk Panel Reseller Series
8. Domain Creation in Plesk
9. Domain Aliases in Plesk
10. Activate or Suspend a customer or subscription
11. Change a subscription's login info in Plesk
12. Manage your domains' DNS zones in Plesk
13. Create databases in Plesk
14. Manage databases with the Web Admin in Plesk
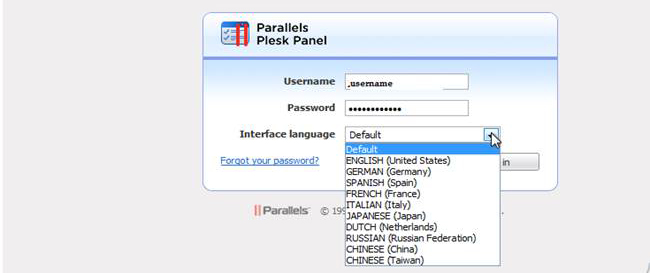
How to log in to Plesk
- Before you can log in to Plesk, you will need to navigate your browser to the URL that should have been given to you by your hosting provider.
2) Once there, enter your username and password in these boxes.
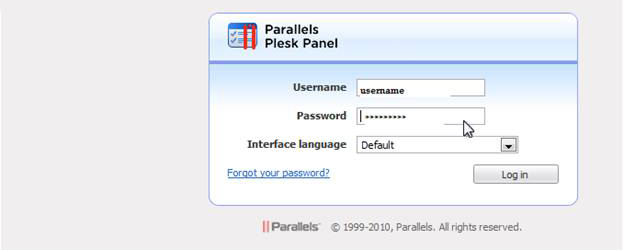
3) If you'd like to change the interface language, use this drop-down menu.
4) Select Log In.


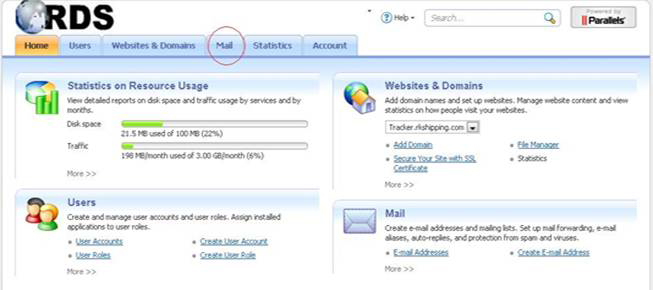
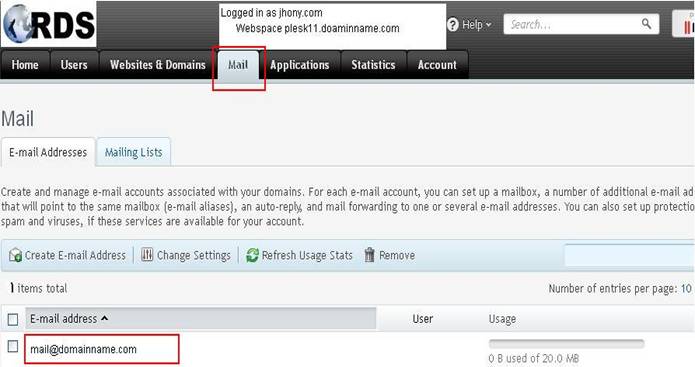
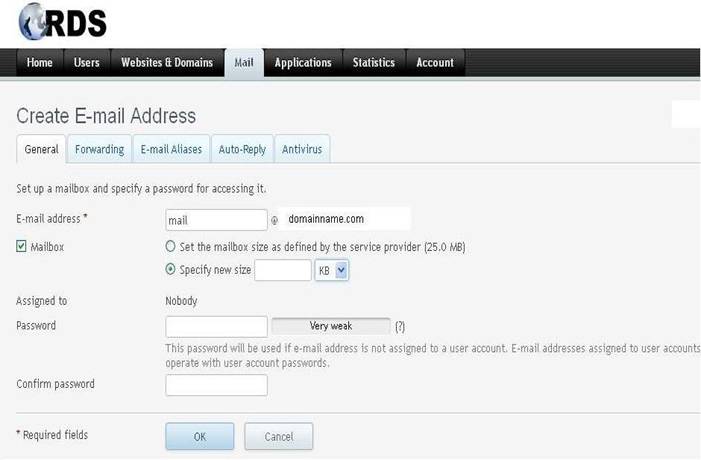
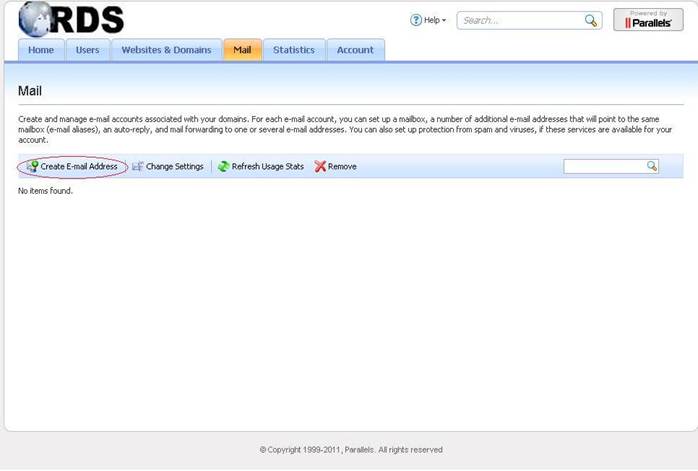
Mail Creations
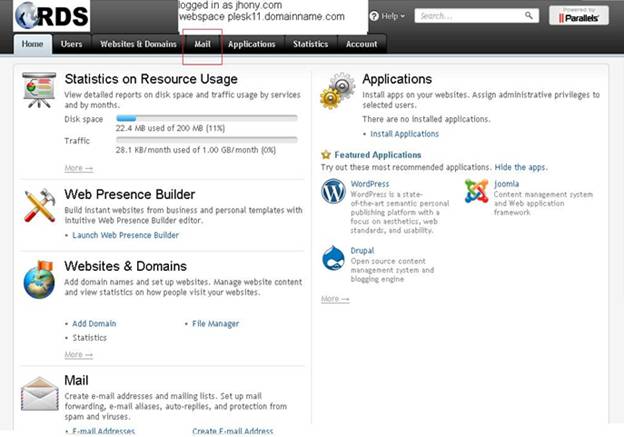
Login Into User Control Panel provided by Hosting Services :
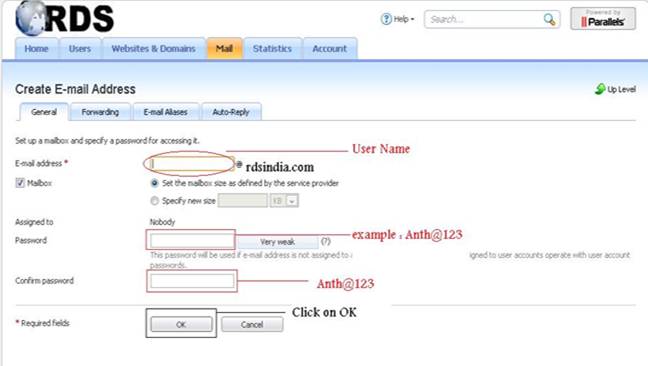
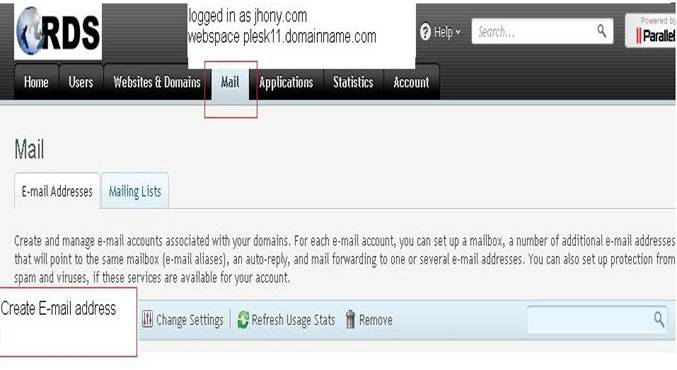
Click on The Tab MAIL :
Click on the Email Address :
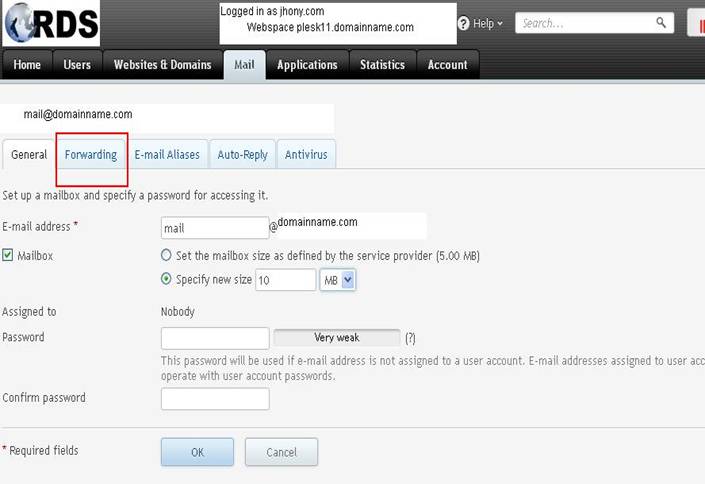
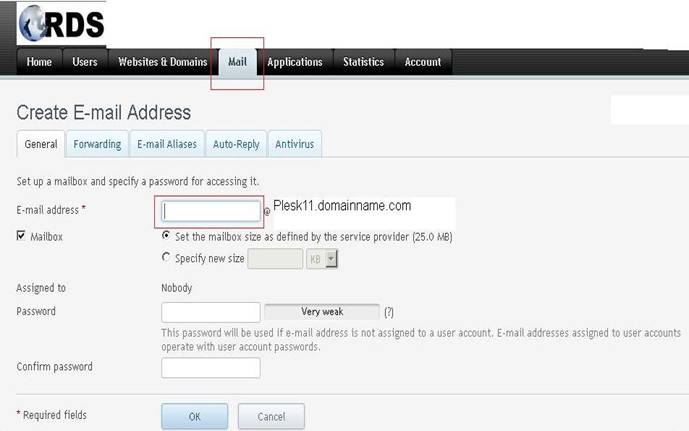
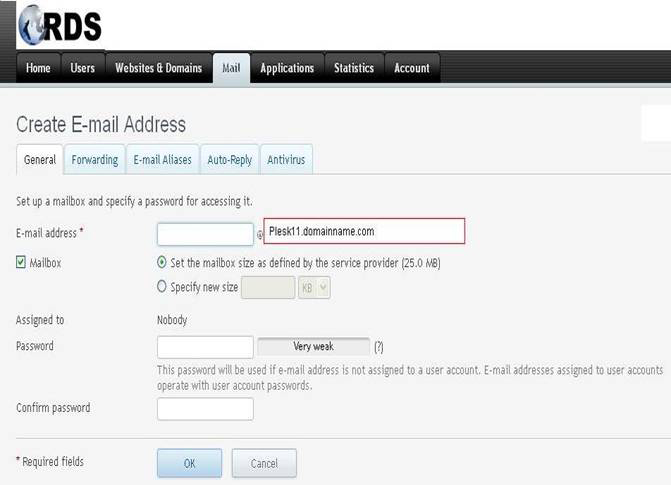
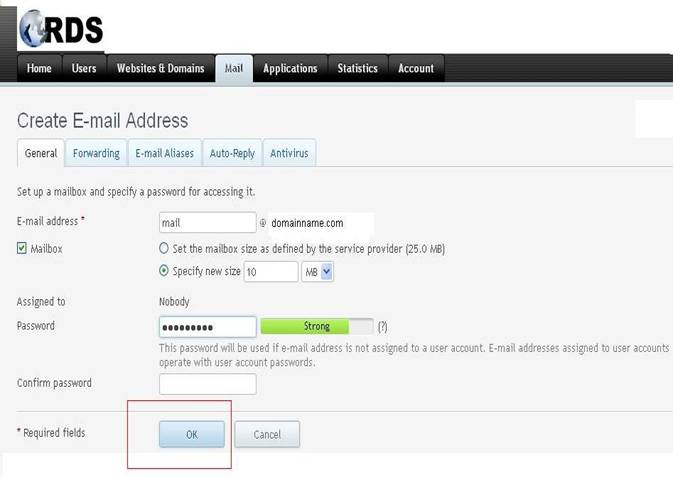
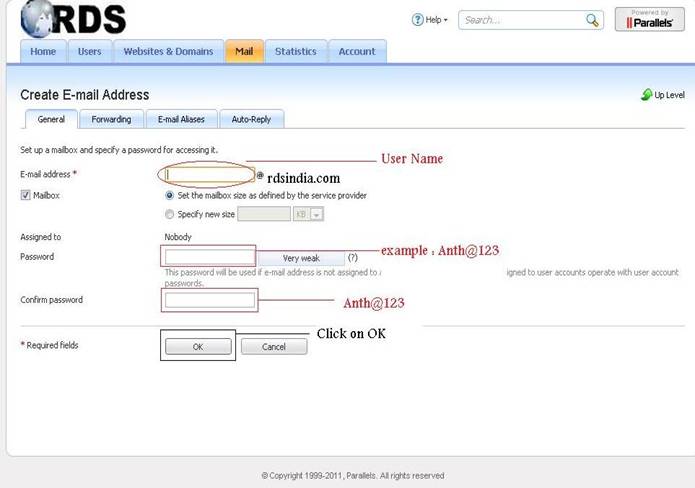
Provide the Details :
And Click OK.
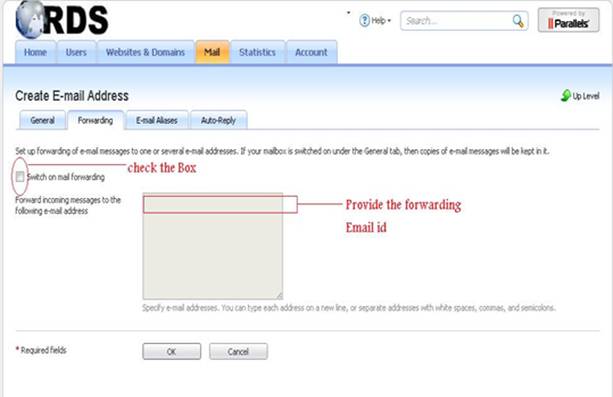
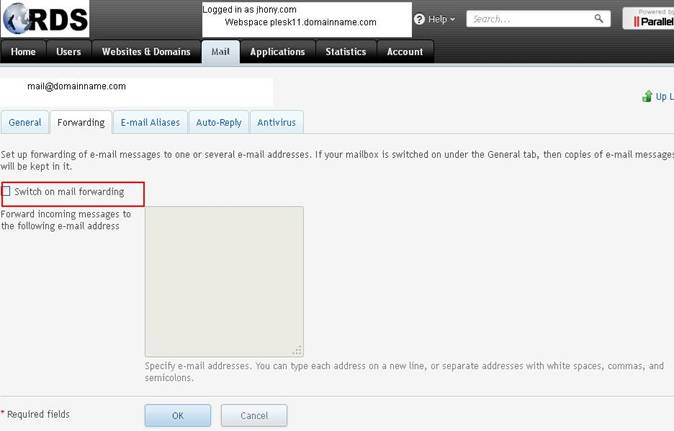
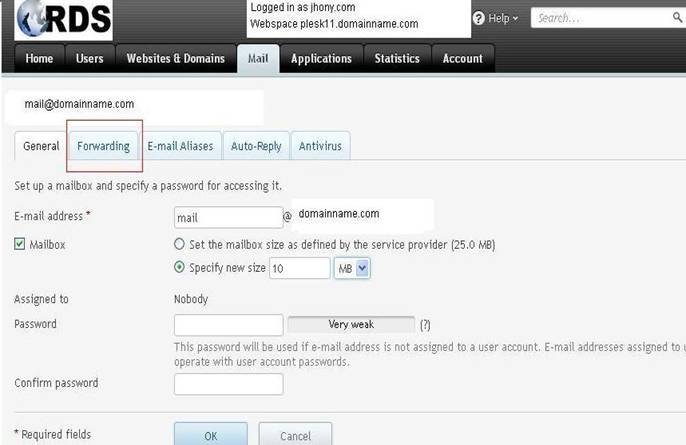
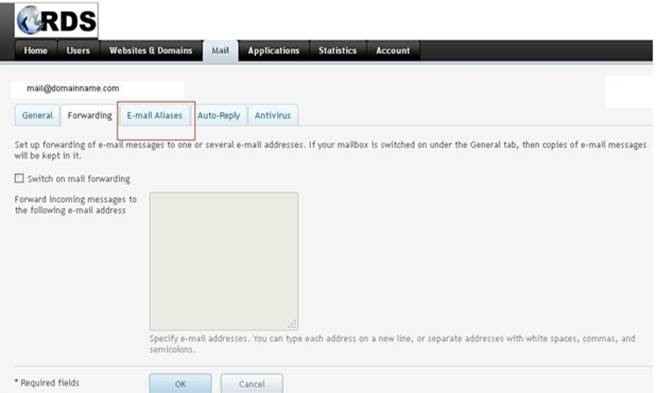
Click on Fowarding :
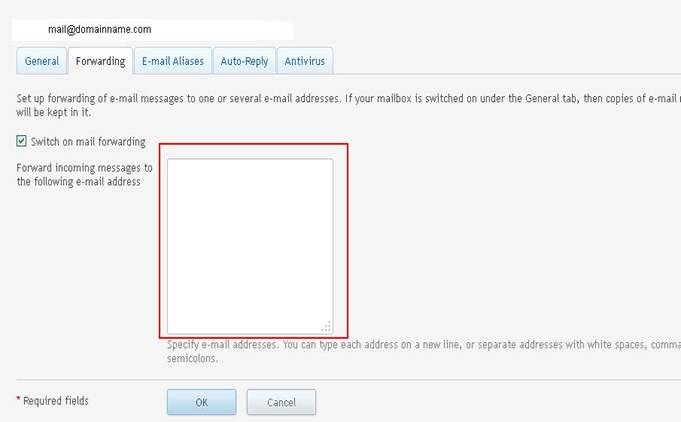
Need to Check the Switch On Mail Forwarding :
And provide the forward email id
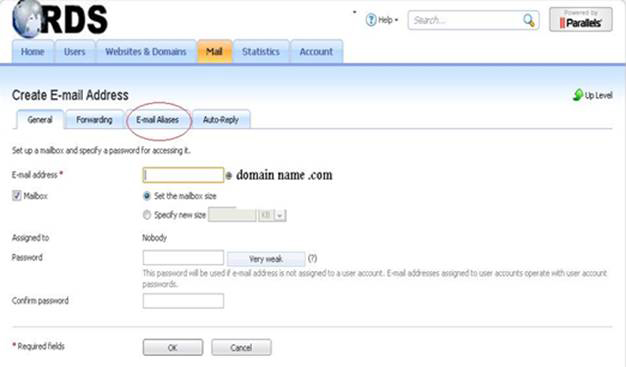
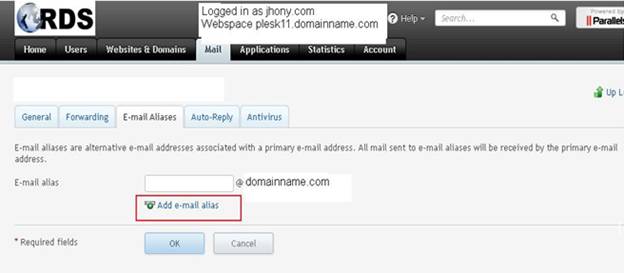
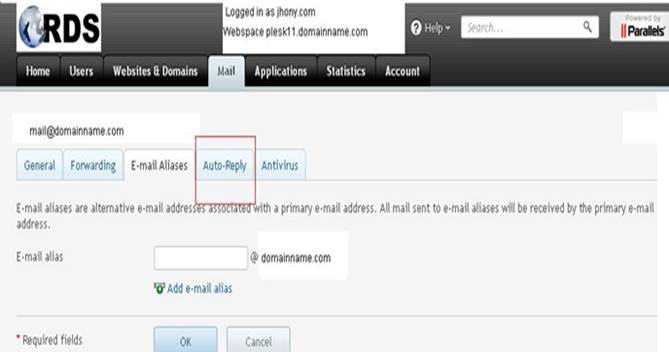
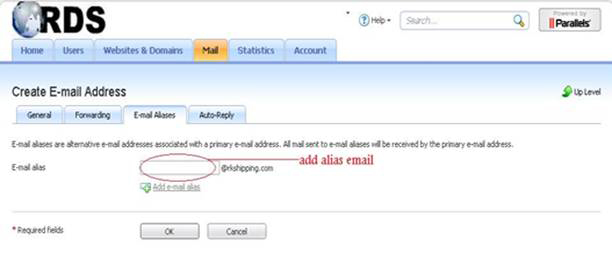
Click On Email Alias:
Add email Alias:
Click OK
HOW to create E-Mail aliases in Plesk
Login Into User Control Panel provided by Hosting Services :
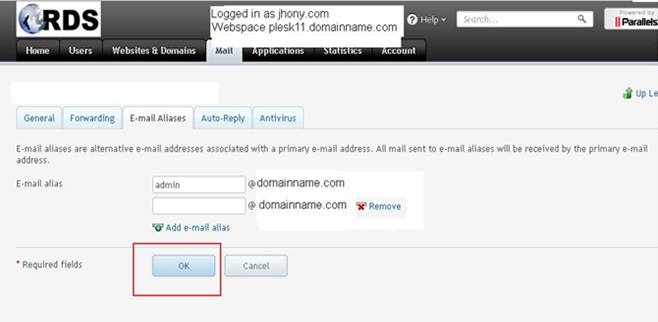
Click On Email Id Aliases :
Click On Add E-mail id Alias :
Provide The Alias Email :
Click Ok :
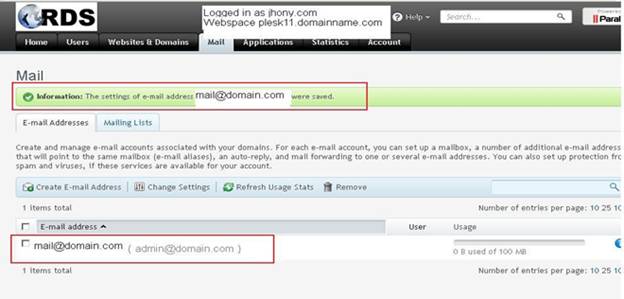
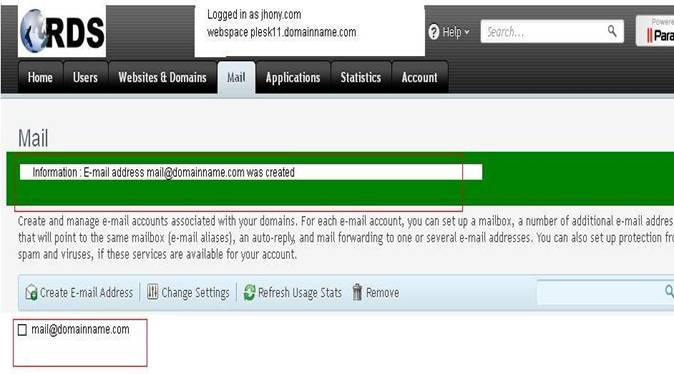
Sucessfully Completed Notification :
HOW to set up e-mail forwarding in Plesk
Login Into User Control Panel provided by Hosting Services :
Click on the TAB of Existing Mail id :
Click On The Option Forwarding :
Chose On Switch On Mail forwarding :
Check The Box And Provide The Forwarding Mail id :
Click on OK

E-mail accounts in Plesk
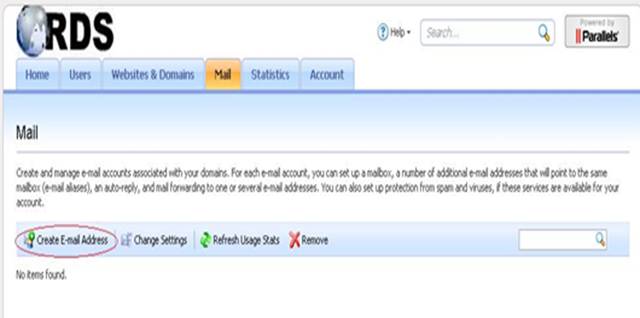
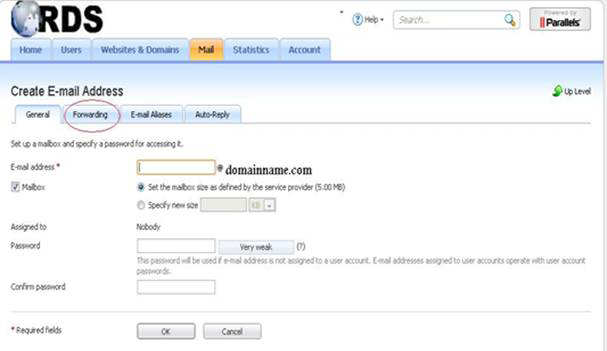
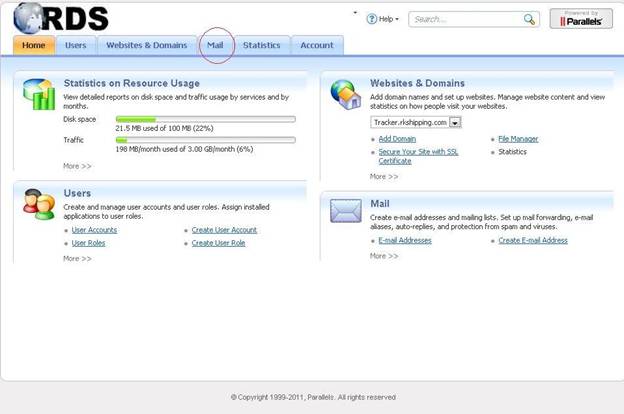
Start by going to the mail tab.
Click create e-mail address :
Type the first part of the e-mail address :
If you have several domain names on your account, select the domain name under which the e-mail address will be created:
Specify the mailbox size if you want it to be different than the default size as defined by the service provider :
Choose a password and type it in these two boxes:

Click ok :
Once you have created an e-mail address, you can edit it by clicking on it :
Click forwarding :
Click e-mail aliases :
Click auto-reply :
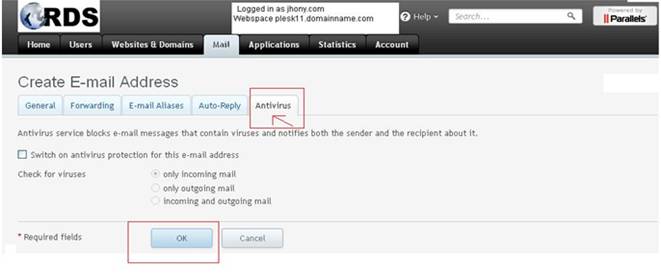
Click antivirus :
How to access webmail in Plesk
To access your webmail in Plesk, direct your web browser to webmail.domain.com:
Click On mail
Click this icon next to the e-mail address:
Provide the Details:
Click OK
Login Page to Access webmail:
Type your mail login credentials.

User webmail Accessing Page

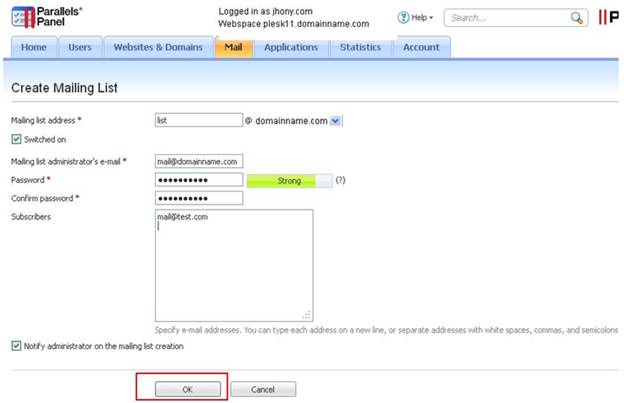
How To Create Mailing Lists In Plesk
Login Into User Control Panel provided by Hosting Services :
Click On Websites & Domain:
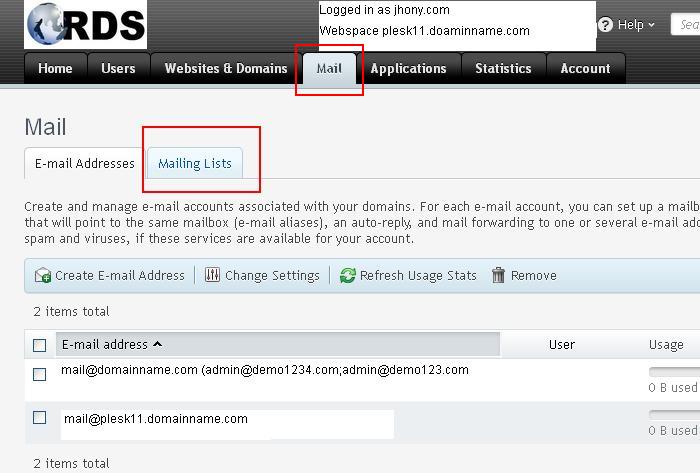
Select the Option MAIL :.
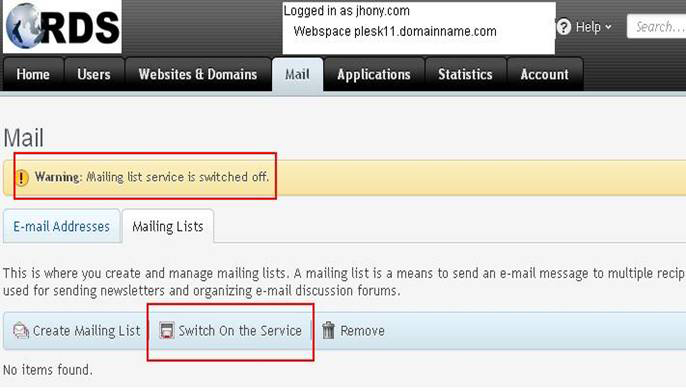
Click On Mailing List :
Switch ON the Services :
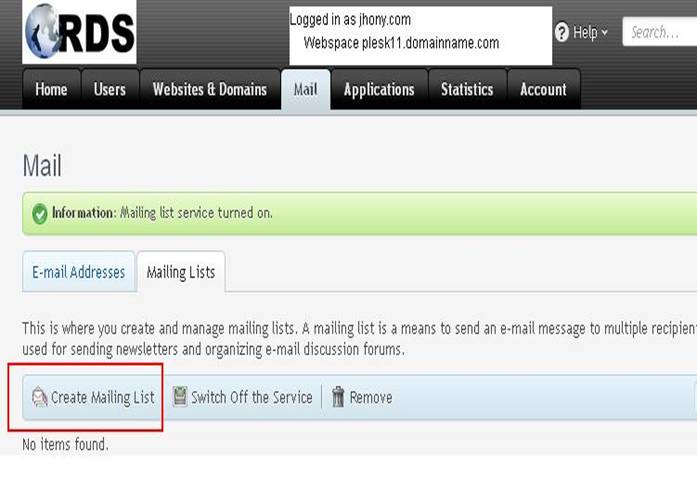
By default, the mailing list service is switched off. Click this button to switch it on:
Now go to create mailing list :
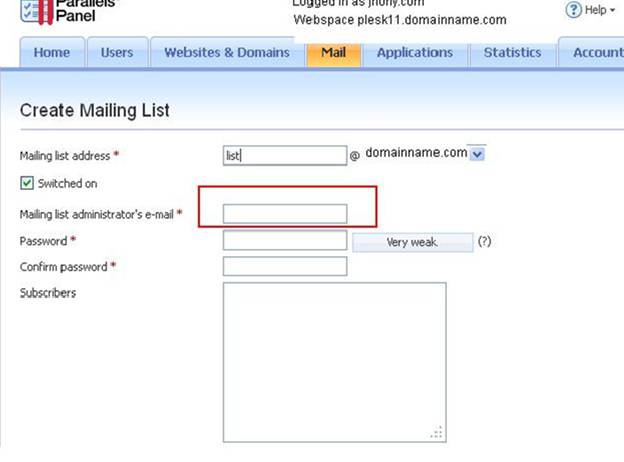
Type the list address :
If you have several domains, select the one under which the list should be created :

Enter the list admin's E-mail :
Type a password in these two boxes :
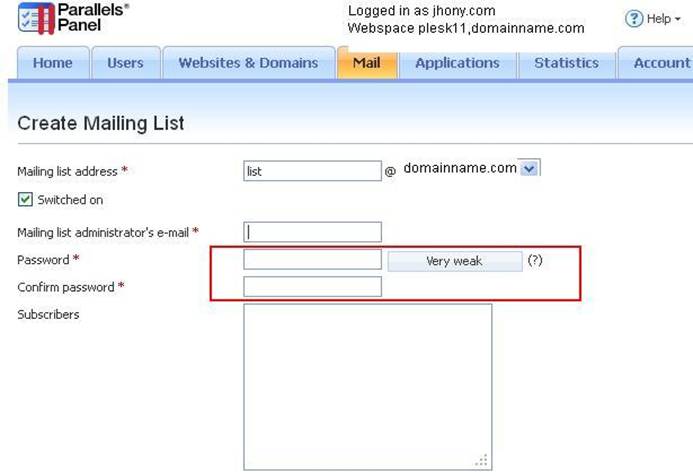
To subscribe users to the mailing list, type their e-mail addresses, one per line :
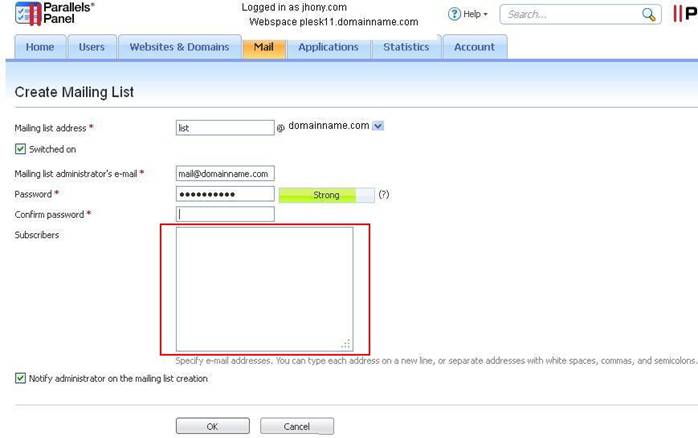
Click OK
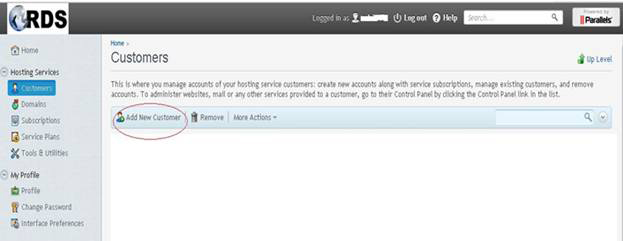
How To Create Domain
Control Panel Login Page :
Provide the credentails
Click on Cutomers:
Click on Add New Customer :
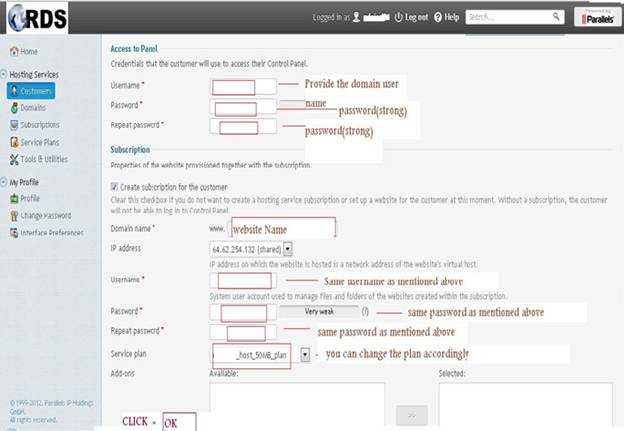
Provide The Details :
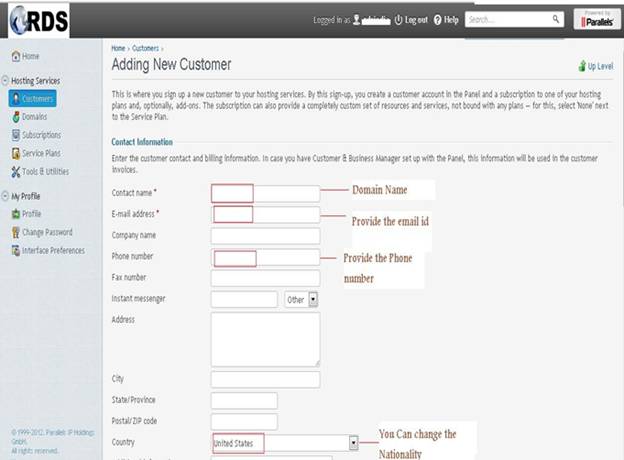
Provide The Details :
Click Ok
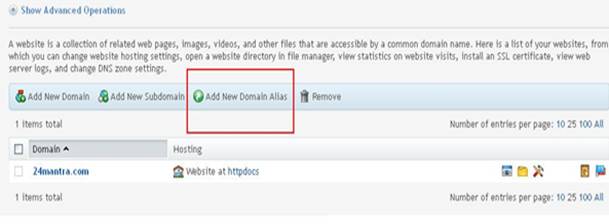
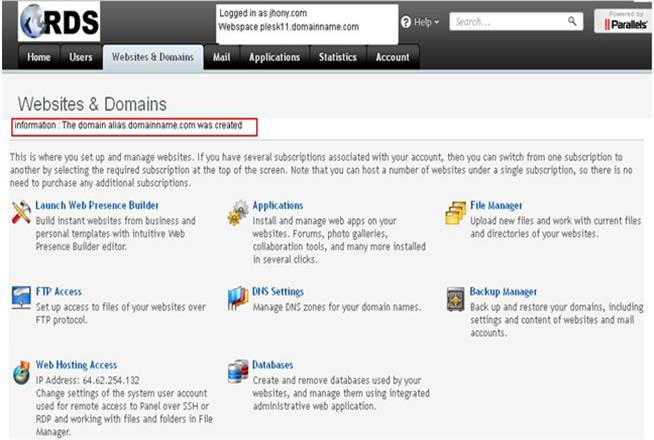
How To Create Domain Aliases In Plesk
Login Into User Control Panel provided by Hosting Services :
Select The Add Domain Alias :
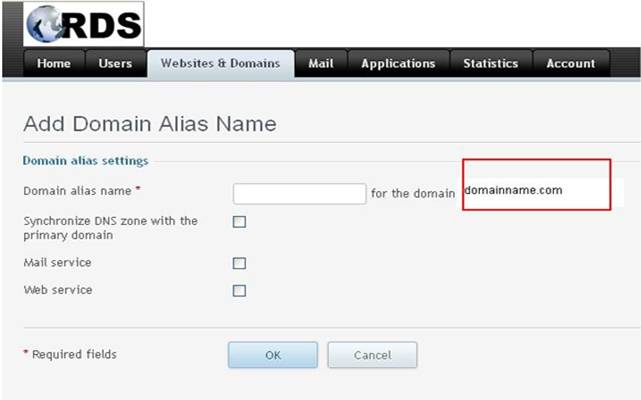
Provide The Alias Domain name for Main Domain:
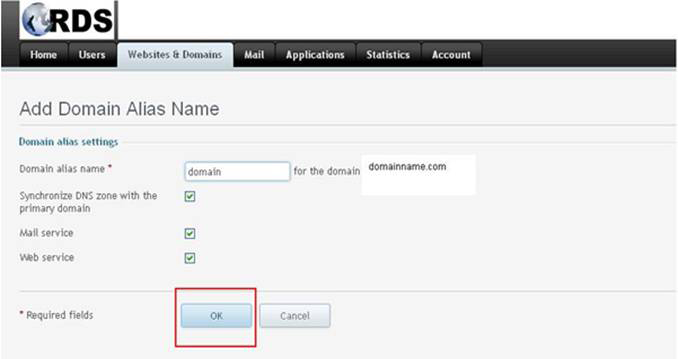
Provide The Alias Domain And Check The Boxes :
Click Ok
Display Status Of Successful Created Alias Domain:
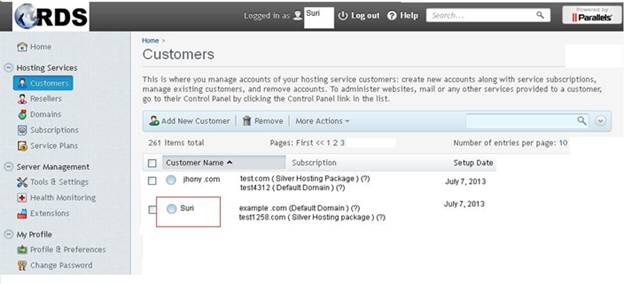
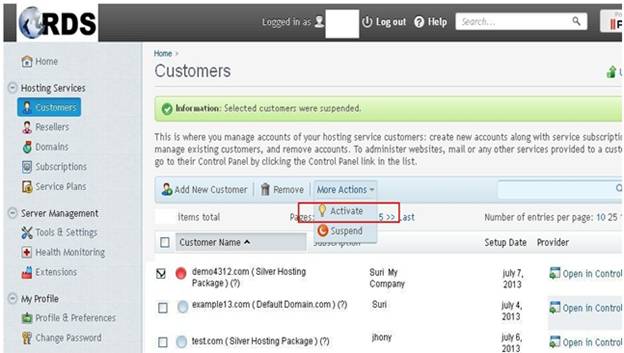
Activate or Suspend a customer or subscription in Plesk
Login Into Control Panel :
Choose the customer :
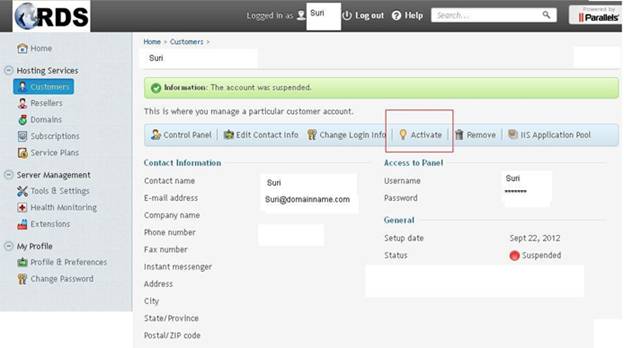
And click suspend:

To re-activate a suspended account, click activate:
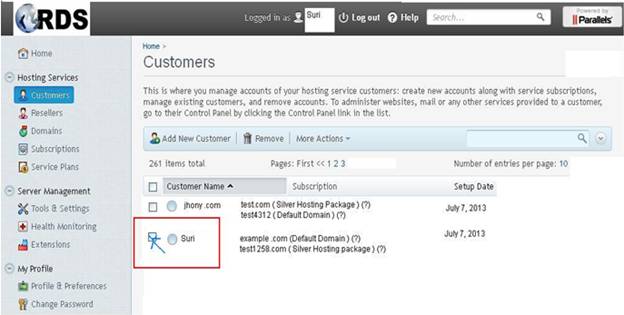
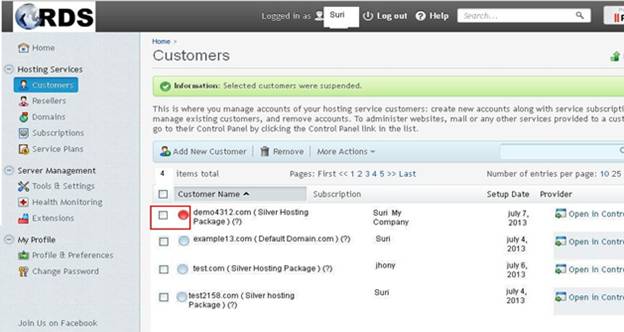
Return to customers :

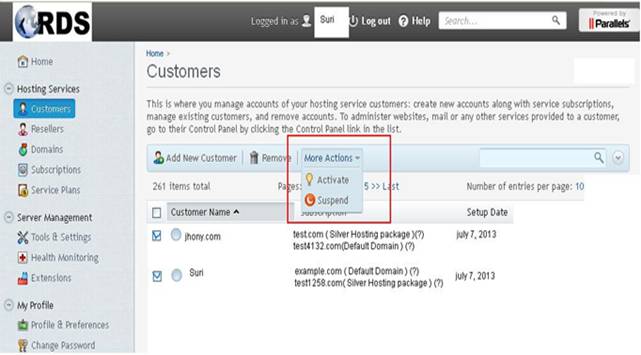
To suspend multiple customers, select each one here :
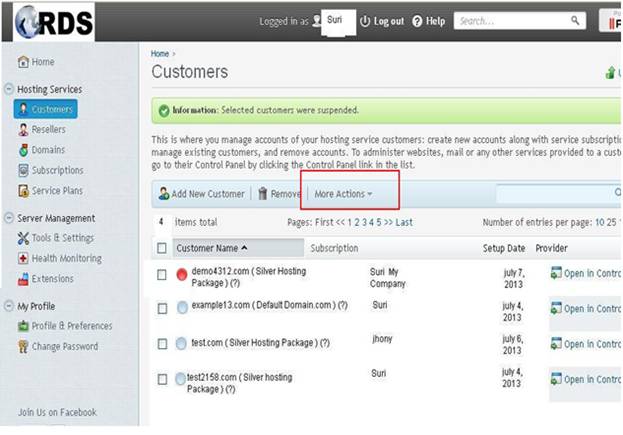
Go to more actions:
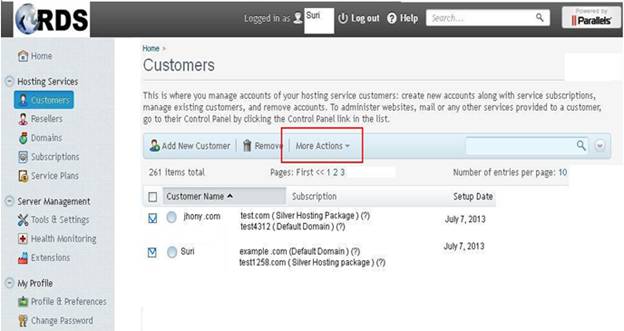
Choose the appropriate action here, either activate or suspend:
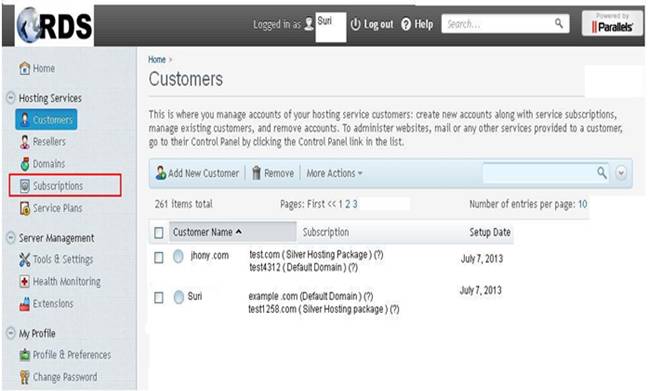
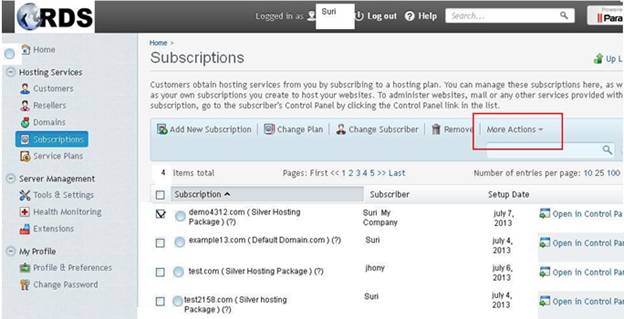
Click subscriptions.
Select the subscription here:
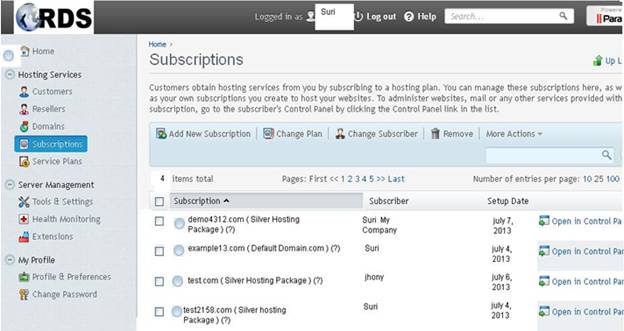
Go to more actions:
Then click suspend:
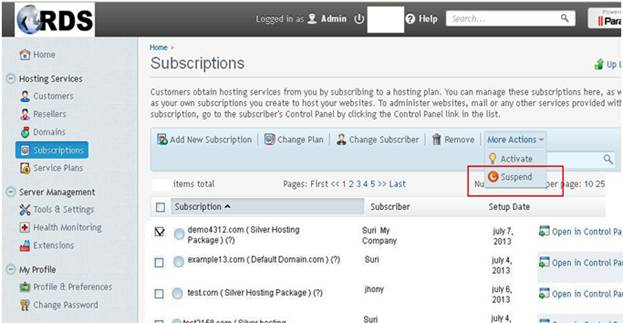
The Domain is supended :
Go to more actions:
And click activate :
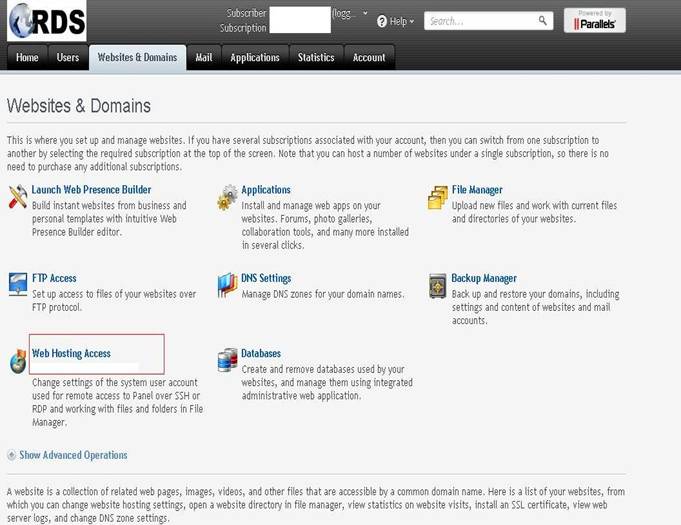
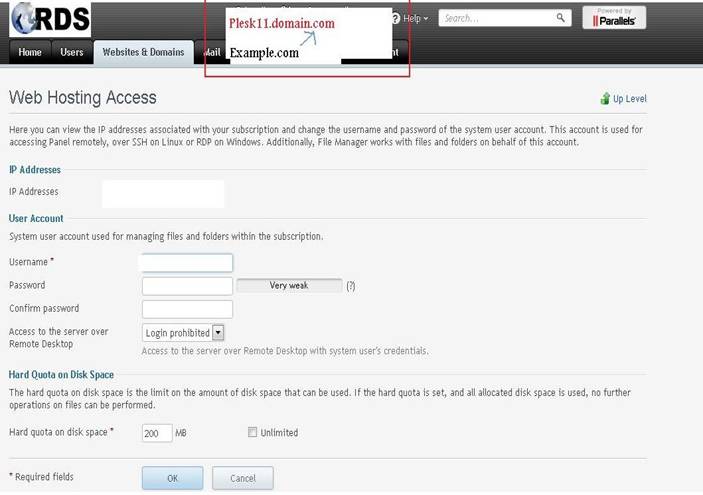
How to change a subscription's login info in Plesk
Go to websites & domains:
All the options shown on this page apply only to the active subscription. We'll see how to switch to a different one in a moment:
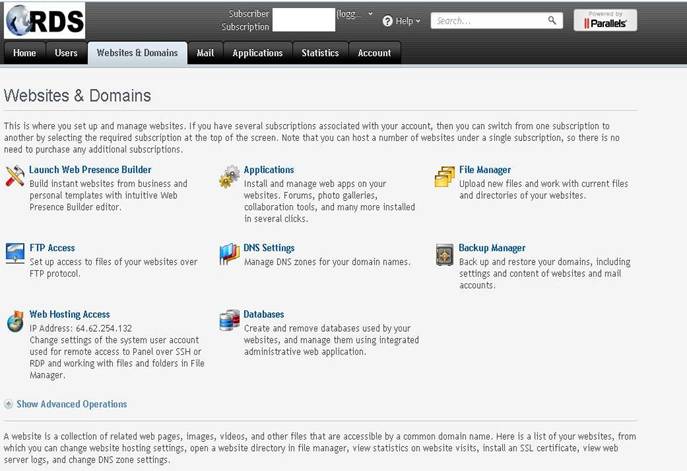
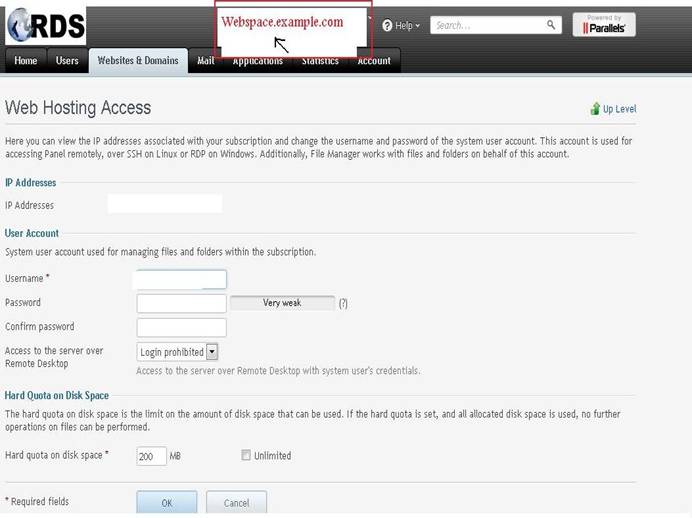
Click web hosting access:
To switch to another subscription, hover over this box:
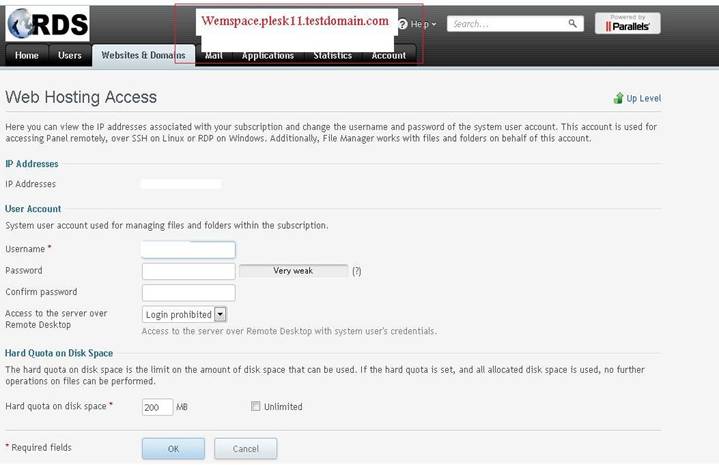
We'll choose the first subscription:
Notice the subscription has changed here:
Now we can make some changes:
Click OK
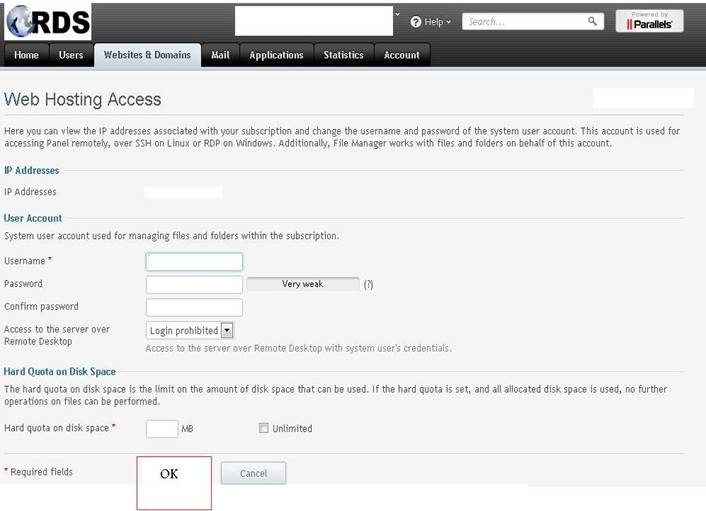
Our hosting settings were updated. Remember, this applies only to the active subscription:

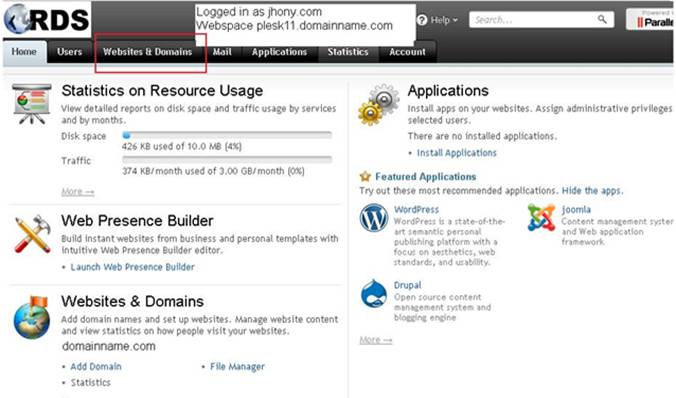
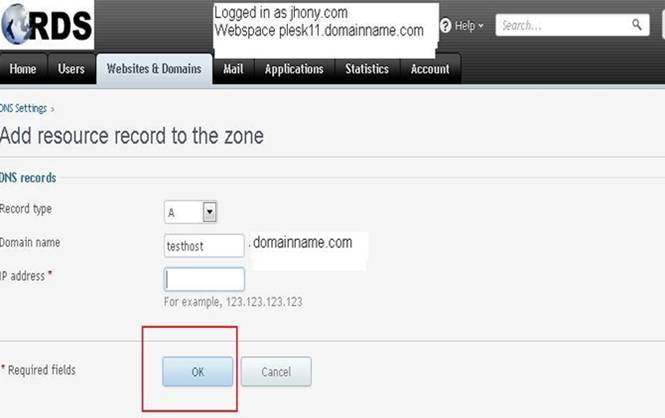
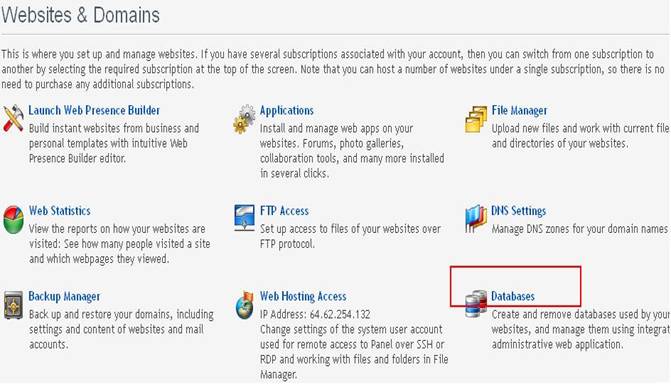
How To Manage Your Domains DNS Zones In Plesk
Login Into User Control Panel provided by Hosting Services :
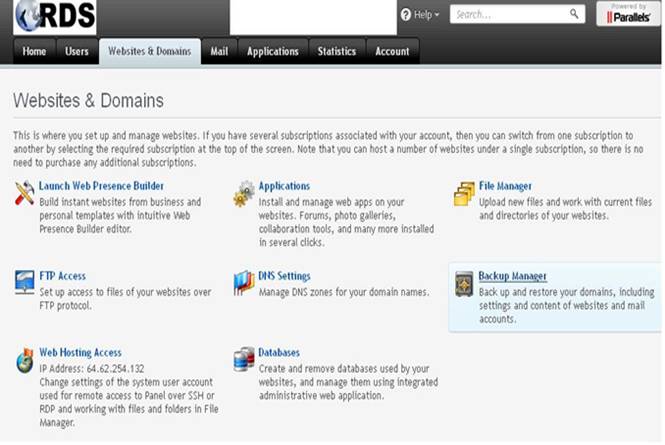
Click On Websites & Domain:
Click On ADD RECORD :
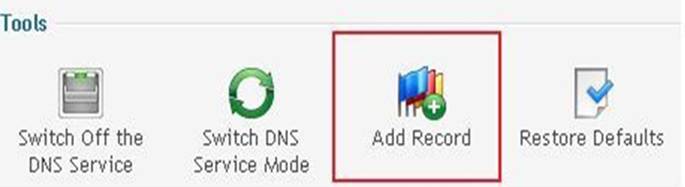
Types Of Records :
Choose the Record :
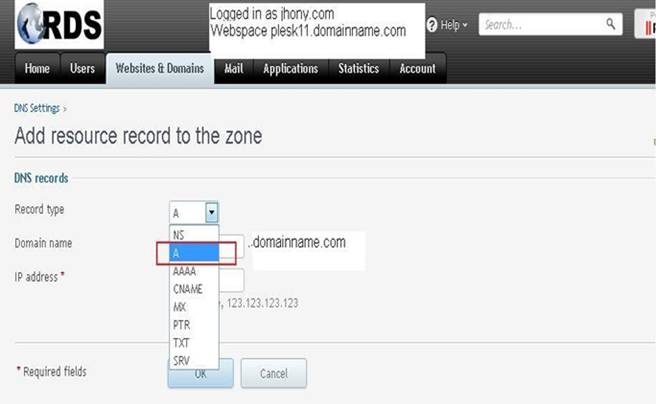
Select The Record Type To “A” :
Note : To point Your Domain To Some Other IP Choose A Record.
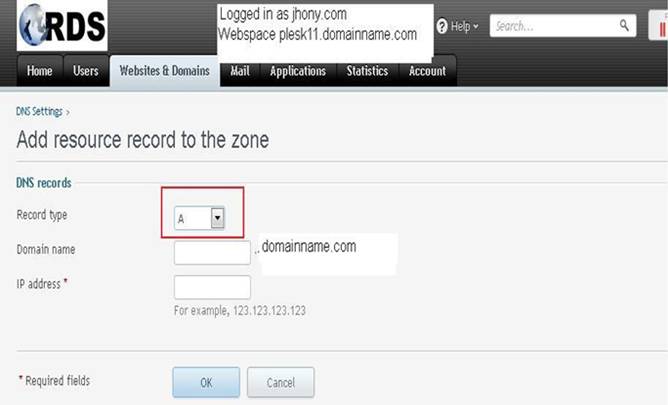
Choose The Record Type And Provide The Domain name :
Click OK:
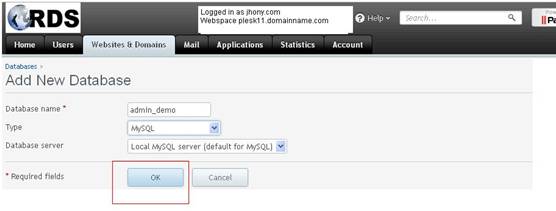
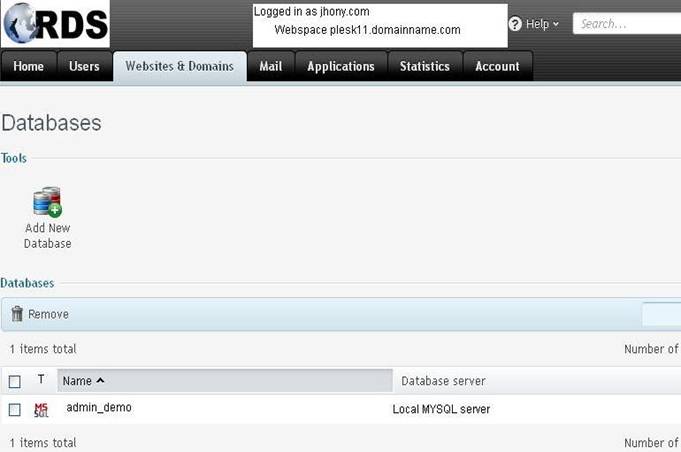
How to create databases in Plesk
>Login Into User Control Panel provided by Hosting Services :
Go to the websites & domains tab :

Then click databases :
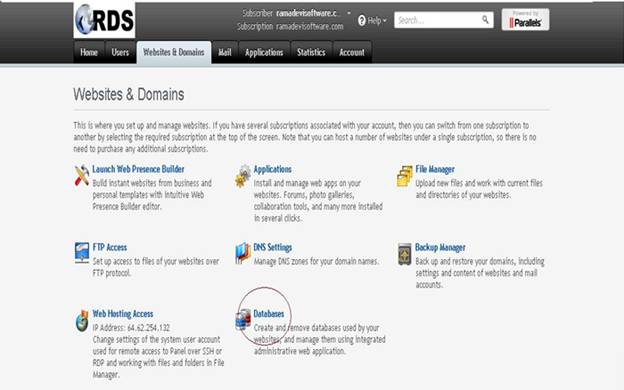
Click add new database:

Enter the database name :
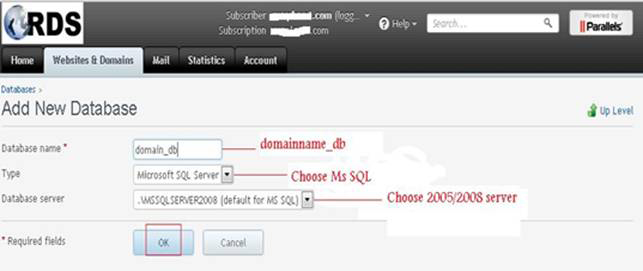
Choose the type of database and the database server :
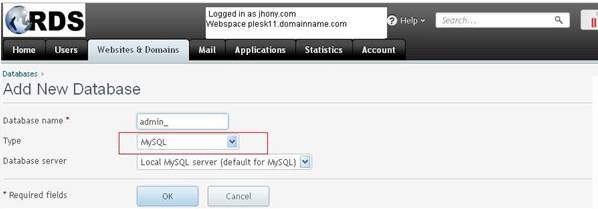
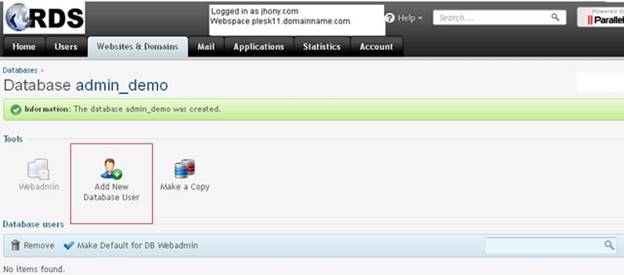
Click ok :
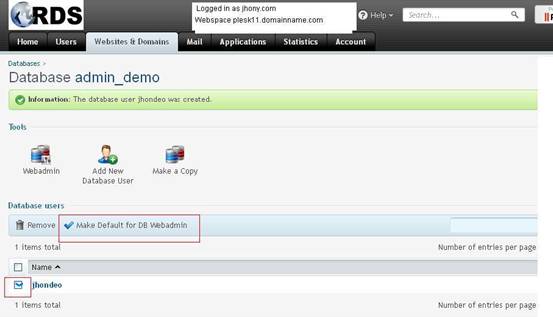
Click add new database user :
Type the username and password :
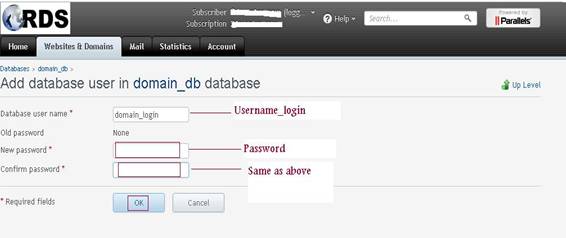
Click ok :

Click the checkbox next to a username :

Click this button :
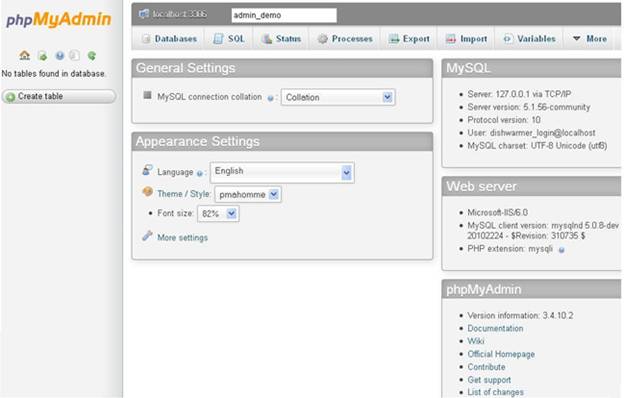
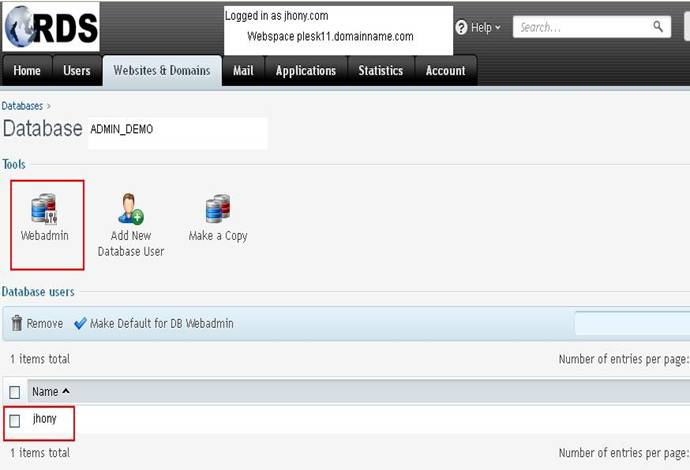
Manage Databases With The Web Admin in Plesk
Login Into User Control Panel provided by Hosting Services :
Click On Websites & Domain:
Select Database :
Click On Database User Name :
Click On The Tool WEB ADMIN And Select The Database User:
PHP My Admin Page For My SQL :
USE : Import And Export Of Your Data