P.O. Box 1000
San Jose, CA 95108
Phone: 408-390-4366
Accessing cPanel
1. How to create email addresses @ yourdomain
2. How to remove mail accounts
3. How to access and check your emails via webmail access.
4. How to configure your email client.
5. Email Clients: Microsoft Outlook
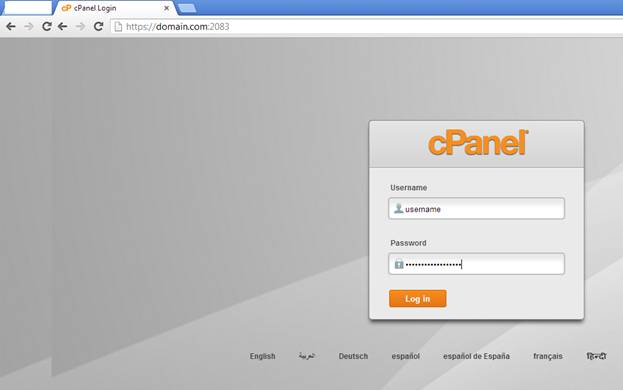
1. Type: https://domain.com:2083 into your preferred Internet browser.
2. Enter your cPanel username into the Username field.
3. Enter your password into the Password field.
4. Click Log in.
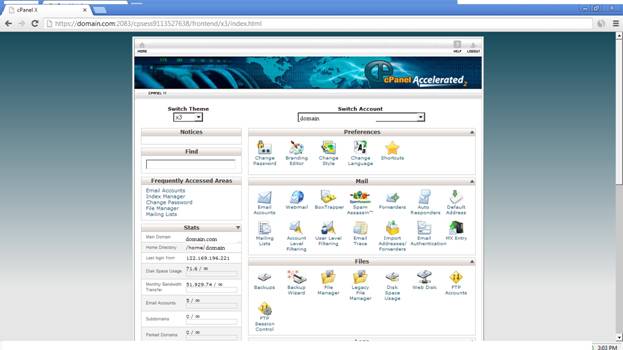
5. You will be greeted by a cPanel startup page on your first login. We strongly recommend completing the getting started Wizard.
Note: A colon symbol following an IP address or domain name denotes a specific port number. These port numbers are responsible for guiding data packets transmitted between 2 computers to specific processes taking place on either machine.
How to create email addresses @ yourdomain
Once you have your own domain name, it is recommended to stop using free email addresses and create your personal email. Here you will learn how to create email accounts such as yourname@yourdomain.
Email addresses
Create Email Accounts
You can easily create e-mail accounts from your hosting account's Control Panel (cPanel). Here is what you need to do:
Step 1: Log into your cPanel
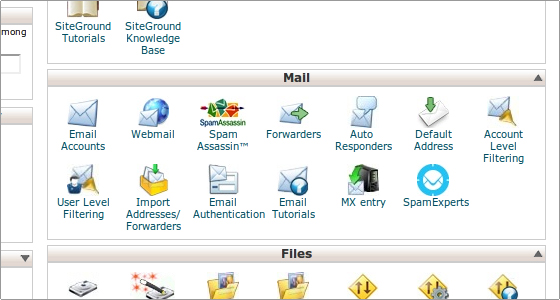
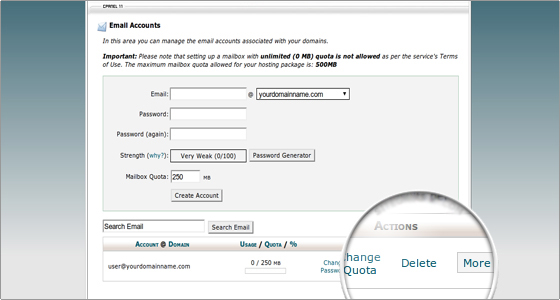
Step 2: Once at the main page, click on the Email Accounts icon.
Step 3: In the fields provided, type the name of the account, the password and the disk space you would like to assign to the mailbox.
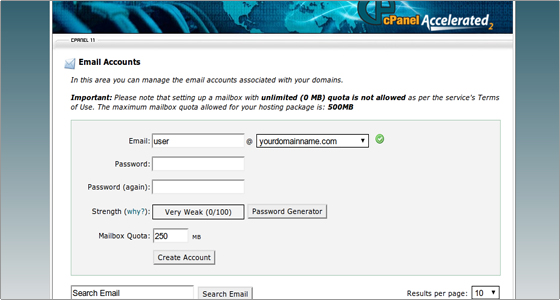
Step 4: Click on the Create Account button to create the mailbox.
You will be taken to a page which asks you for confirmation. Click on Yes to create the mailbox.
How to remove mail accounts
There is no problem to remove any added email accounts.
To delete a mail account, simply click on the Delete button next to it.
You will be taken to a page which asks you for confirmation. Click on Yes to delete the account.
Email password
How to change your email password
It is very easy to change your email password through your cPanel. You will be able to make this update even if you do not remember your current email password. To change the password you need to follow the steps below:
![]() Step 1: Login to your cPanel
Step 1: Login to your cPanel
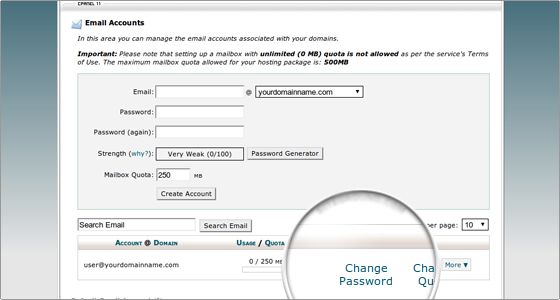
![]() Step 2: From the cPanel home, you need to click on the Email Accounts icon.
Step 2: From the cPanel home, you need to click on the Email Accounts icon.
![]() Step 3: From the mail menu, select Change Password next to the mail account whose password you wish to modify.
Step 3: From the mail menu, select Change Password next to the mail account whose password you wish to modify.
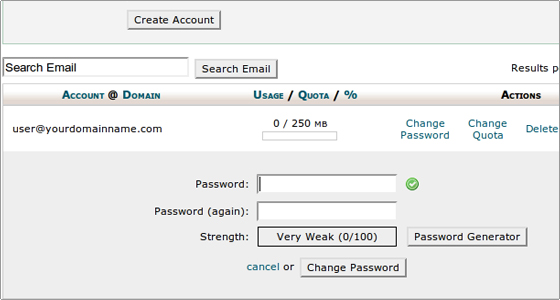
![]() Step 4: A new panel will be opened. Fill in the new password and click on the Change Password button to save it.
Step 4: A new panel will be opened. Fill in the new password and click on the Change Password button to save it.
Please, click here for cPanel video tutorial about: Managing your email accounts. (https://www.cpanel.net/media/tutorials/emailaccounts.htm)
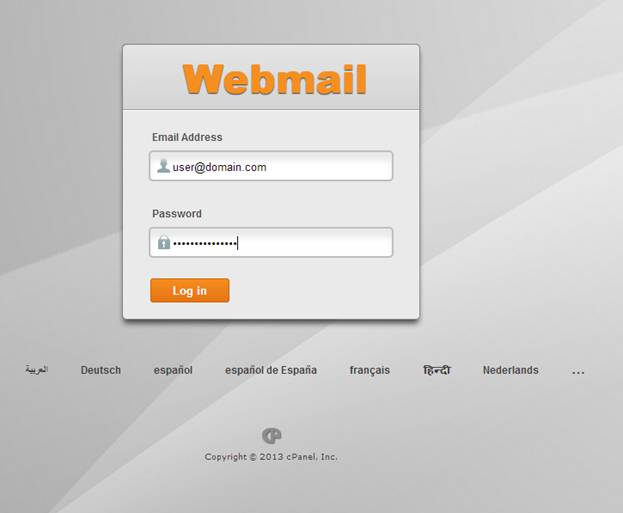
How to access and check your emails via webmail access
The webmail access of your email accounts allows you to open your email at home or at work or from any computer connected to the Internet. Learn how to access and check your emails via webmail.
How to use webmail to access your e-mail account
You can use either the webmail interface or an email client. If you need help configuring email clients, please visit the step-by-step guides for configuring MS outlook and Mozilla Thunderbird.
You can easily access your WebMail interface by just visiting: http://www.domainname.com/webmail, where 'domainname.com' is your actual domain name. If this is not working for you, it might be possible that your ISP is blocking the access to non-standard ports loaded through an SSL connection. In this case, please use:http://webmail.servername.com, where 'servername.com' should be the name of your server (e.g.http://webmail.domainname.com).
Please use the full e-mail account's username to login to the webmail interface or when setting your e-mail client software. Example: user@domainname.com instead of user.
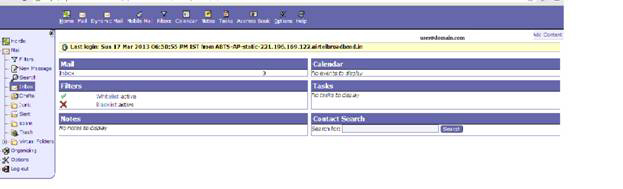
Once you login, you can choose between three webmail clients: Horde, RoundCube and SquirrelMail. It is up to you to decide which one you like better.
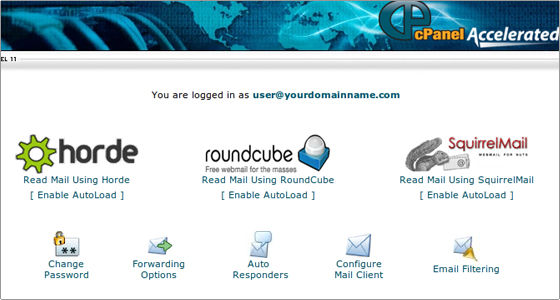
If you login to your webmail through the Webmail icon on your cPanel main page, you will be logged in with the default system email account.
In order to use your email you have to create another email account with the same or different username.
To login to one of your e-mail accounts from your cPanel, you should go to Email Accounts and then click the Access Webmail link next to the account you wish to access. Then you should type in the password corresponding to the account and click on Login.

How to send e-mail messages via webmail?
You can easily send email messages through the webmail client you have chosen. Just find the New message button in Horde, the Compose button in Squirrelmail or the Create a New Message button in RoundCube and you will be able to start writing your message.

How to configure your email client
The IMAP/POP3/SMTP access allows you to set your email address to work with the convenient email clients such as Outlook express, MS Outlook, Mozilla Thunderbird. Learn how to configure your email client.
You can use either the webmail interface or an email client. If you decide to use an email client, such as Microsoft Outlook Express, MS Outlook, Mozilla Thunderbird and Eudora, here are the settings you need:
Incoming mail server (POP3/IMAP server): mail.yourdomainname.com
Outgoing mail server (SMTP server): mail.yourdomainname.com
Username: the full e-mail address. Example: you@yourdomainname.com instead of you.
Password: Assigned in cPanel -> Email Accounts.
SMTP authentication must be enabled for the login to be successful.
Email ports
The POP3 port for inbound emails is 110
The SMTP port for outbound emails is 25
Email Clients: Microsoft Outlook
This Microsoft Outlook Configuration Tutorial is a step-by-step guide on how to configure your Microsoft Outlook email client in order to make it work with your web-based email account.
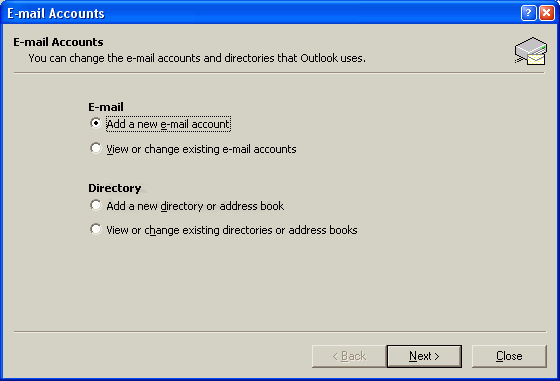
Step 1: Open Outlook, and click on the Tools menu. Please, select E-mail Accounts...
Step 2: Select the option Add a new e-mail account. Click 'Next'
Step 3: Select the type of account you would like to create (IMAP or POP3)

Step 4: Fill in the Internet E-mail Settings fields as follows:
Your Name - Enter your name as you would like it to appear in the From: field of all outgoing mail
E-mail Address - Enter the email address which the others will use to send email messages to you.
Incoming mail server (POP3/IMAP server): mail.domain.com
Outgoing mail server (SMTP server): mail.domain.com
User Name: please use the full e-mail account name. Example: user@domain.com instead of you.
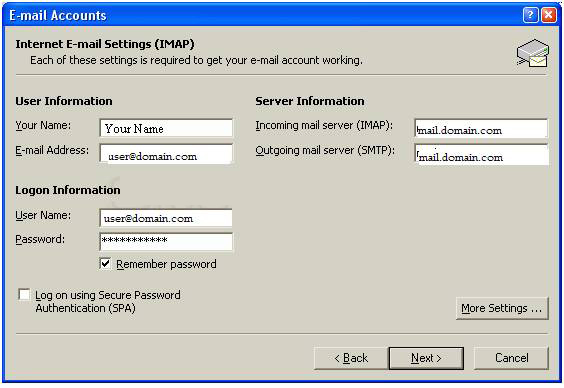
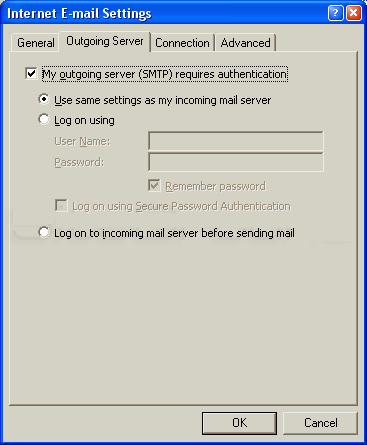
Step 5: Click on the More Settings... button
Choose the Outgoing Server tab and check the My outgoing server (SMTP) requires authentication checkbox.
Check the option Use same settings as my incoming server.
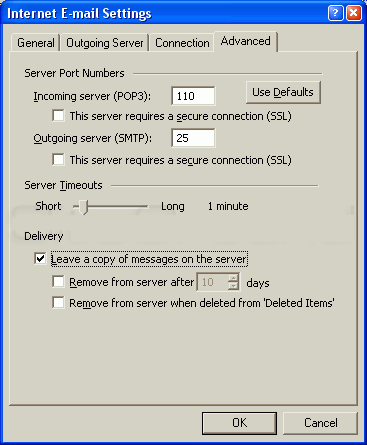
Step 6: Choose the Advanced tab
Here you can choose if you wish to Leave a copy of the messages on the server or not.
Please do not use secure authentication as we do not support this method.
Step 7 : Ok and Close.
MSOUTLOOK 2010
Configure Microsoft Outlook Using POP3
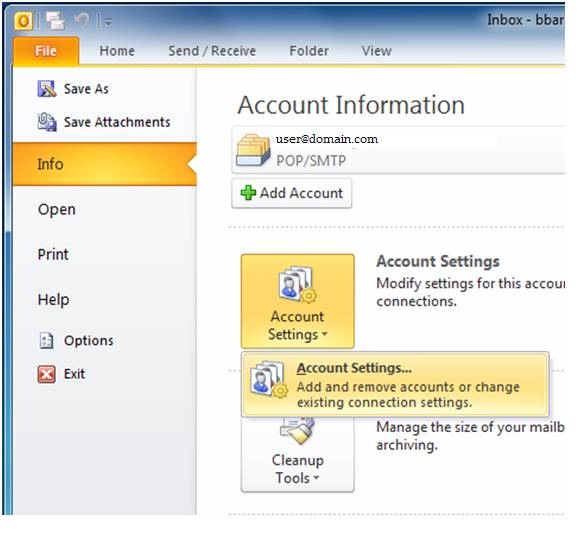
Click on the File tab, select Info, and then click on the Account Settings button and select Account Settings.
Outlook 2007: Click on the Tools menu and select Account Settings.
Outlook 2003: Click on the Tools menu and select E-mail Accounts. Select Add a new e-mail account and click Next.
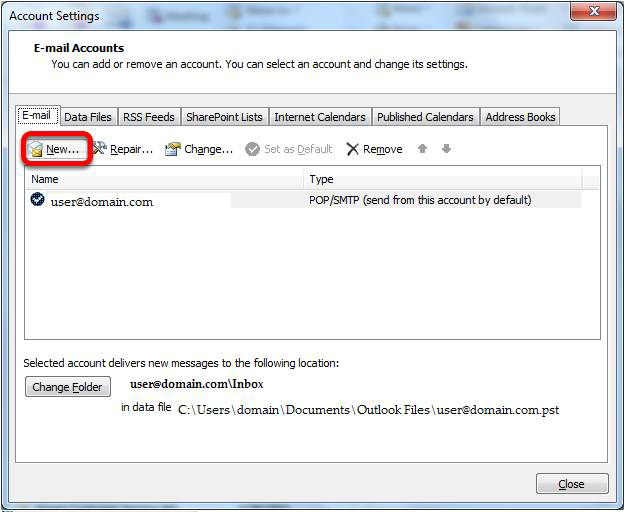
Click on New to add your domain email address.
Outlook 2003: Select POP3 and click Next.
If you do not have existing email accounts in Outlook, skip ahead to the next step.
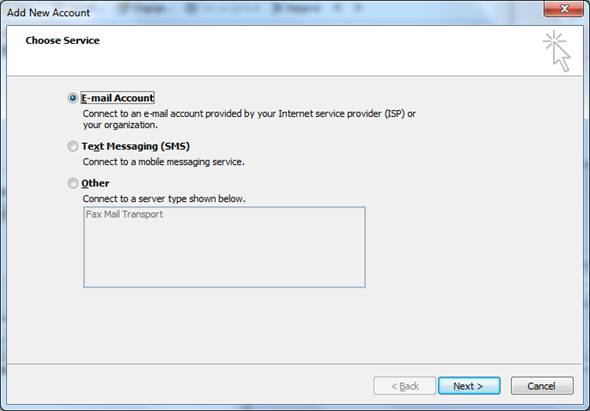
Select Email Account and click Next.
Outlook 2007: Select Microsoft Exchange, POP3, IMAP, or HTTP and click Next.
Outlook 2003: Skip this step.
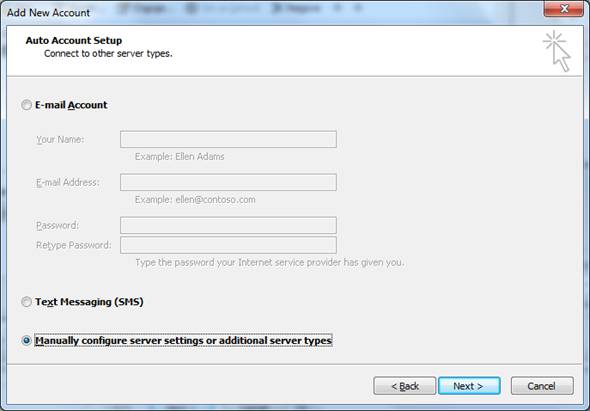
Select Manually configure server settings or additional server types and click Next.
Outlook 2003: Skip this step.
Select Internet E-mail and click Next.
Outlook 2003: Skip this step.

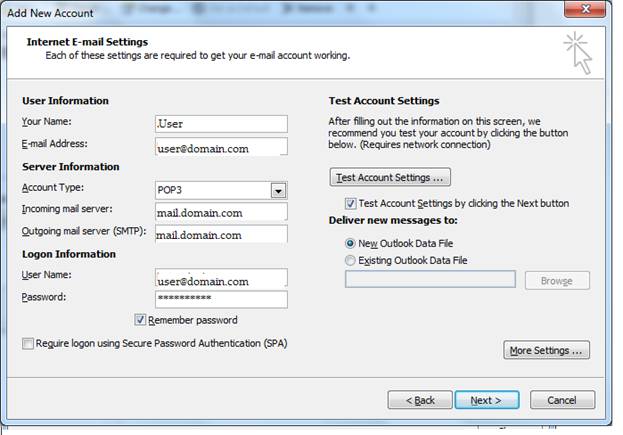
Enter the following email settings:
Your Name: Enter your name as want it to appear on your outgoing messages.
Email Address: Enter your full domain email address.
Account Type: Select POP3 (Outlook 2010 and 2007 only)
Incoming mail server: mail.domain.com
Outgoing mail server (SMTP): mail.domain.com
User Name: Enter your full domain email address.
Password: Enter your domain email password and put a check next to Remember password.
After filling in all of the email settings, click on More Settings.
7. Select the Outgoing Server tab and then put a check next to My outgoing server (SMTP) requires authentication. Leave the default option, Use same settings as my incoming mail server, selected.

8. Select the Advanced tab. Under the Incoming server (POP3) and the Outgoing server (SMTP) select None from the drop down lists labeled Use the following type of encrypted connection is None. Next, change the outgoing server port number 25.
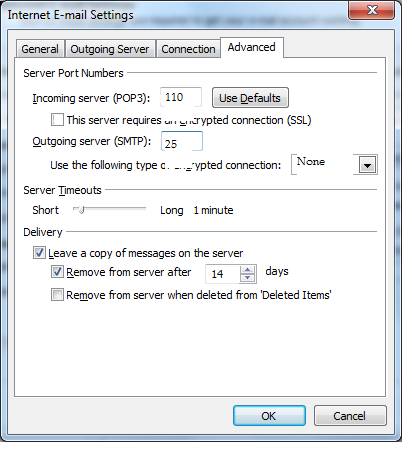
Click OK.
9.Outlook 2010 users will automatically receive a Test Account Settings pop-up window. All tests will have status Completed if the configuration was successful.
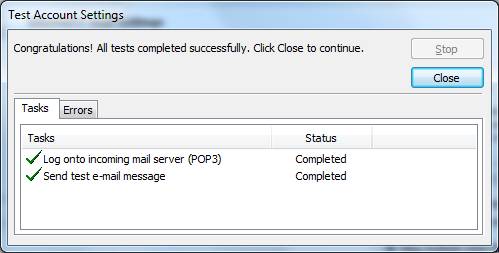
Click Close
10. Click Finish.
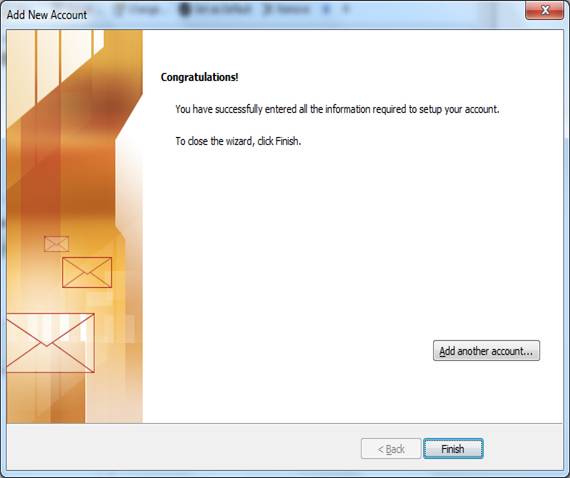
11. Click Close
Your email account configuration has been completed